Garage door sensors are an integral component of modern garage door systems, designed to ensure safety and prevent accidents. When these sensors malfunction, it can lead to frustration and potential security concerns, especially if you are using a Chamberlain Sears Craftsman garage door opener. This article provides a comprehensive guide on how to reset garage door sensors, troubleshoot common issues, realign them, and perform necessary fixes to restore your garage door’s functionality.
Understanding Garage Door Sensors
What Are Garage Door Safety Sensors?
Garage door safety sensors are crucial devices designed to prevent the garage door from closing if there’s an obstruction in the door opening. These sensors, often referred to as garage door safety sensors, are typically located near the floor on either side of the garage door and are essential for a residential garage. They are a standard feature in most automatic garage door systems and are essential for protecting people, pets, and objects from being caught under the door, especially in residential garages.
How Garage Door Sensors Work
Garage door sensors operate using an infrared beam that spans across the door opening. One sensor emits the beam, and the other sensor receives it. When the beam is unbroken, the garage door opener functions normally, allowing you to close the garage door. If an object or person interrupts the beam, the sensors signal the garage door opener to stop and reverse the door, preventing it from closing. This safety mechanism is vital for preventing accidents.
Common Issues with Garage Door Sensors
Here are some common issues that can affect garage door sensors. These issues often manifest as problems with the infrared beam, particularly in the photo eye, and can include:
- Misalignment, where the sensors are not pointing directly at each other, can often be resolved with a garage door sensor sun shield.
- Dirt or debris obstructing the sensor lenses can hinder the effectiveness of the gstb-r stb-bl garage sensor.
Additionally, wiring problems, damaged brackets, or malfunctioning sensors can also lead to problems. Troubleshooting these issues is the first step towards a fix, whether that means cleaning or realigning the sensors, or considering a garage door sensor replacement.
Troubleshooting Garage Door Sensors
Garage Door Sensor Lights Not On
Here’s what to do if your garage door sensor lights are off, indicating a potential issue with the photo eye or that the sensors are not working properly, which could lead to reasons why your garage door won’t operate. This usually suggests a power problem or that the sensor isn’t working right, which may require a garage door repair. You can start troubleshooting by checking a few things:
- Make sure the garage door opener is getting power.
- Look at the sensor wires to be sure they’re connected well and not broken, as faulty connections may indicate that the sensors are not working properly, affecting the safety feature of the garage door.
If the wires and connections look good, then check if the sensor brackets are aligned correctly and undamaged. If everything else checks out, you might need to replace the garage door sensor to solve the problem.
Why Garage Sensors Are Not Lighting Up
Here are several potential reasons why your garage sensors might not be lighting up. Often, the cause stems from a simple issue. These can include:
- Misalignment, where the sensors aren’t correctly facing each other, can lead to a malfunctioning garage door.
- Dirty sensor lenses that obstruct the infrared beam.
Beyond these common problems, faulty wiring, damaged sensors, or a blown fuse in the garage door opener could also be the culprit. Troubleshooting typically involves checking the alignment, cleaning the lenses, and inspecting the wiring. If problems persist, consider a garage door sensor replacement or a garage door repair to ensure proper functionality.
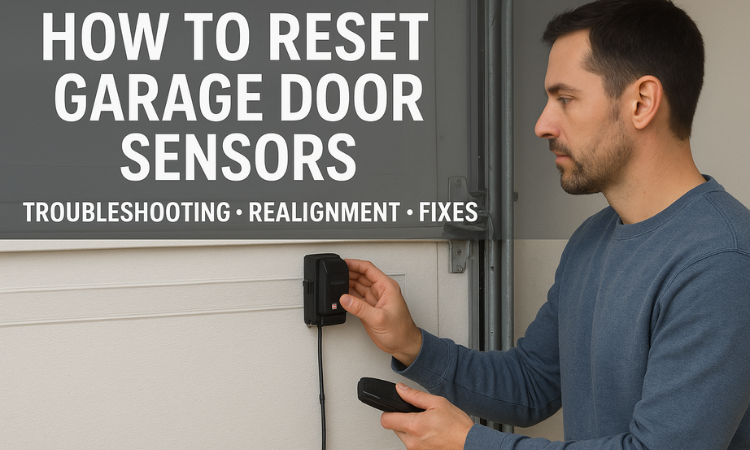
How to Reset Garage Door Sensors
Resetting your garage door sensors can often resolve minor issues and restore proper functionality. To reset the sensors, start by disconnecting the garage door opener from its power source. Next, clean the sensor lenses with a soft cloth to remove any dirt or debris. Check the sensor alignment to ensure they are facing each other correctly. After ensuring the sensors are clean and aligned, reconnect the garage door opener to the power source to see if the door starts to close properly. In many cases, this simple reset can restore the sensors to their optimal state. If the garage door safety sensors are compatible with liftmaster chamberlain craftsman models, you should make sure the reset steps are followed accurately.
Cleaning and Maintaining Garage Door Sensors
How to Clean Garage Door Sensors
Cleaning your garage door sensors is a simple yet effective way to maintain their functionality. Begin by disconnecting the power to your garage door opener. Use a soft, dry cloth to gently wipe the lenses of the sensors, removing any dust, dirt, or debris that may be obstructing the infrared beam used by the genie garage door openers manufactured. Avoid using harsh chemicals or abrasive cleaners, as these can damage the lenses. Regular cleaning, performed every few months, can significantly improve the performance and reliability of your garage door safety sensor.
Importance of Regular Maintenance
Regular maintenance of your garage door sensors is crucial for ensuring the safety and reliability of your automatic garage door system. Routine checks can help identify and address potential issues before they escalate into major problems. Regular cleaning of the sensors, inspecting the wiring, and ensuring proper alignment can prevent malfunctions and extend the lifespan of your garage sensors, including the stb-bl garage sensor for genie. Neglecting maintenance can lead to unexpected breakdowns and costly repairs, or even a need for replacement for liftmaster chamberlain craftsman garage door sensors. Make sure you check the brackets and clean the door opening.
Checking for Obstructions
One of the most common reasons for garage door sensor problems is obstructions blocking the infrared beam, which can often be resolved with a garage door sensor sun shield. Regularly inspect the area around the sensors for any objects that may be interfering with the beam’s path, as these issues with your garage door can prevent it from functioning properly. This could include boxes, tools, leaves, or even spiderwebs. Ensure that nothing is blocking the photo eye sensors or their line of sight across the door opening to close your garage door safely, as this is a critical safety feature. By keeping the area clear of obstructions, you can prevent the garage door from malfunctioning and ensure the safety sensors are working effectively. If the smart garage control starts to malfunction, check these measures as well.
Realigning Garage Door Sensors
How to Realign Garage Door Sensors
To realign your garage door sensors, begin by visually inspecting the sensor brackets to ensure they are securely mounted and not bent or damaged, especially if using a sensor kit compatible with Liftmaster. Loosen the screws holding the sensors in place and gently adjust their position until they are pointing directly at each other, ensuring they are part of a sensor kit compatible with Liftmaster. You may need assistance to observe the garage door sensor lights, which should indicate when the sensors, such as the chamberlain craftsman garage door sensors, are properly aligned. A steady light on both sensors usually signifies correct alignment. Make sure the safety sensors are pointing at each other, as misalignment can lead to issues with your garage door. Then, tighten the screws to secure the sensors in their new position.
Tools Needed for Realignment
Realigning garage door sensors typically requires a few basic tools. A screwdriver is essential for loosening and tightening the screws that hold the garage door safety sensor, such as the 41a5034 garage safety sensor kit, in place. A level can help ensure that the sensors are aligned horizontally. A pair of pliers may be needed to adjust the brackets if they are bent or damaged. Additionally, a soft cloth can be useful for cleaning the sensor lenses to ensure a clear path for the infrared beam, which is a crucial safety feature of the garage door system. With these simple tools, you can perform a proper realign to fix the garage door sensors.
Signs That Sensors Need Realignment
Several signs indicate that your garage door sensors need to be realigned. The most obvious sign is when the garage door refuses to close and the garage door opener light is blinking, signaling a sensor issue. You may also notice that one or both of the sensor lights are off or flickering. Another sign is if the garage door closes partially and then reverses. These symptoms suggest that the infrared beam is not properly aligned. The door is not closing, and you need to realign the sensors of your safety sensors, which may include the 41a5034 safety sensor kit compatible with your model.
Repairing and Replacing Garage Door Sensors
How to Repair Garage Door Sensors
Repairing garage door sensors often involves troubleshooting the wiring and connections, which may require a garage door bracket compatible with your model. Begin by inspecting the wires for any signs of damage, such as fraying or corrosion. Secure any loose connections and replace damaged wires. Check the sensor brackets to ensure they are properly mounted and not bent, as using a garage door bracket compatible with your system is essential. Clean the sensor lenses with a soft cloth to remove any dirt or debris. If the sensors still malfunction after these steps, consider a garage sensor for genie garage door as a potential replacement. If the door is not closing, it might require a professional fix.
When to Consider Garage Door Sensor Replacement
Consider a garage door sensor replacement when basic troubleshooting and repairs fail to resolve the issue. If the sensors are visibly damaged, such as cracked lenses or broken housings, replacement is necessary. If the sensors continue to malfunction despite cleaning, realigning, and repairing the wiring, it may indicate an internal fault that could require a sensor kit compatible with Liftmaster. Additionally, if your garage door opener is an older model, upgrading to newer, more reliable sensors can improve the overall safety and performance of your automatic garage door system. Best garage doors are not possible without properly working sensors, such as the gstb-r stb-bl garage sensor.
Compatible Sensors for Liftmaster Chamberlain Craftsman Garage Door Openers
When replacing garage door sensors, ensure that the new sensors are compatible with your garage door opener model. Liftmaster, Chamberlain, and Craftsman garage door openers often use specific sensor types, including the 41a5034 safety sensor kit compatible with Liftmaster. Look for sensors that are explicitly designed for these brands. Some sensors are universally compatible with Liftmaster, Chamberlain, and Craftsman garage door openers made after 1997, while others may require specific wiring or adapters. Always consult the manufacturer’s specifications to ensure proper compatibility and functionality. Also, be aware of the 41a5034 garage door sensor
 How to Align Garag..