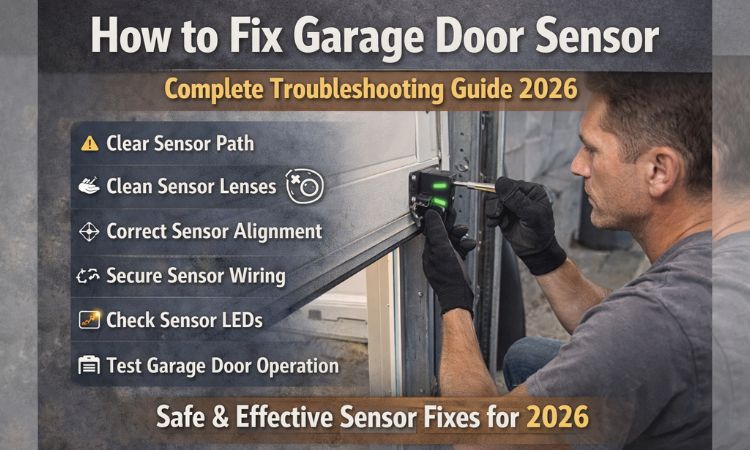
When your garage door refuses to close or reverses unexpectedly, faulty sensors are often the culprit. Learning how to fix garage door sensor issues can save you time, money, and the frustration of a malfunctioning garage door. This comprehensive guide walks you through diagnosing sensor problems and provides step-by-step solutions to fix garage door sensor malfunctions in Queens, NY, and nationwide. Garage door safety sensors are critical components that prevent the door from closing when objects, pets, or people are in the way. Understanding how to fix garage door sensor problems ensures your door operates safely while avoiding unnecessary service calls.
Understanding Garage Door Safety Sensors
Before you can effectively fix garage door sensor issues, it’s important to understand how these safety devices work and why they’re essential to your garage door system.
What Are Garage Door Safety Sensors?
Garage door safety sensors, also called photo-eye sensors or photoelectric sensors, are small devices mounted on either side of your garage door opening near the ground. They create an invisible infrared beam across the doorway. If anything breaks this beam while the door is closing, the sensors signal the opener to stop and reverse the door immediately.
Safety Requirement: This safety feature has been federally mandated since 1993 after numerous accidents involving garage doors closing on people, particularly children. Modern garage doors cannot close properly if the sensors are misaligned, dirty, or malfunctioning, making it essential to know how to fix garage door sensor problems when they arise.
Common Signs Your Garage Door Sensors Need Attention
Recognizing sensor problems early helps you fix garage door sensor issues before they cause bigger operational problems. Watch for these warning signs:
The door won’t close
Your garage door opens normally but refuses to close, or closes only when you hold down the wall button continuously. This is the most common indicator that you need to fix garage door sensor alignment or connection issues.
The door reverses immediately
The door begins to close but reverses direction before touching the ground, even when nothing is blocking the path. This suggests sensor misalignment or sensitivity problems requiring you to fix garage door sensor positioning.
Sensor lights are off or blinking
Most sensors have indicator lights (usually green or red). If these lights are off, blinking, or showing unexpected colors, you’ll need to fix garage door sensor power or alignment issues.
How to Fix Garage Door Sensor: Quick Diagnosis Checklist
Before attempting to fix garage door sensor problems, perform this systematic diagnosis to identify the specific issue affecting your garage door system.
Step 1: Check Sensor Indicator Lights
Each sensor typically has an LED indicator light. Understanding what these lights mean helps you fix garage door sensor issues more efficiently.
What the lights tell you:
- Solid green light on both sensors: Sensors are properly aligned and functioning correctly
- One green, one red/amber: The sensor with the red or amber light is receiving power but not detecting the beam from the opposite sensor, indicating misalignment
- No lights on either sensor: Power supply issue or wiring problem
- Blinking lights: Obstruction in the beam path or sensor misalignment
Step 2: Look for Physical Obstructions
Before assuming you need to fix garage door sensor electronics or alignment, rule out simple blockages.
Check for:
- Dirt, dust, or cobwebs on sensor lenses
- Small objects in the beam path (toys, tools, leaves)
- Ice or snow buildup in winter months (common in Queens, NY)
- Spider webs across sensors (very common problem)
- Water or condensation on sensor lenses
How to Fix Garage Door Sensor: Step-by-Step Solutions
Now that you’ve diagnosed the problem, follow these detailed instructions to fix garage door sensor issues based on what you discovered.
Solution 1: Clean Your Garage Door Sensors
Dirty sensors are the easiest problem to fix garage door sensor operation issues, yet they’re frequently overlooked.
Step-by-step cleaning process:
Solution 2: Realign Your Garage Door Sensors
Misalignment is the most common reason homeowners need to fix garage door sensor issues. Fortunately, realignment is straightforward.
Detailed realignment process:
Regional Considerations: How to Fix Garage Door Sensor Issues in Queens, NY
Homeowners in Queens face unique environmental challenges that affect how often they need to fix garage door sensor problems.
Weather-Related Sensor Issues
Humid summers:
Queens’ humid summer weather can cause condensation on sensor lenses, blocking the infrared beam. Regular cleaning becomes especially important June through September. If you frequently need to fix garage door sensor issues in summer, consider installing small fan-driven air circulators near the sensors.
Harsh winters:
Ice, snow, and road salt kicked up by vehicles can coat sensors during winter months. Queens homeowners often need to fix garage door sensor visibility issues more frequently January through March. Installing small protective covers or hoods above sensors helps prevent snow and ice accumulation.
Urban Environmental Factors
Dust and pollution:
Queens’ urban environment means more airborne particles that settle on sensors. Monthly cleaning prevents buildup that requires you to fix garage door sensor operation.
Vehicle exhaust:
Attached garages in residential Queens neighborhoods accumulate exhaust residue on sensors from cars idling in the driveway. This film requires regular cleaning to maintain sensor function.
Advanced Troubleshooting: When Basic Fixes Don’t Work
If standard solutions don’t resolve your problem, these advanced techniques may help you fix garage door sensor issues that resist simple repairs.
Dealing with Sunlight Interference
Direct sunlight can overwhelm sensor infrared beams, particularly during certain times of day when the sun shines directly on sensors.
How to fix garage door sensor sunlight problems:
- Install small hoods or visors above sensors to shade them from direct sun
- Slightly angle sensors away from direct sunlight while maintaining alignment
- Consider relocating sensors to a position where sunlight doesn’t directly strike them
- Upgrade to sensors with better sunlight rejection capabilities
Addressing Electrical Interference
Radio frequency interference from other devices can disrupt sensor operation, requiring you to fix garage door sensor signal problems.
How to fix garage door sensor interference issues:
- Replace LED bulbs in the garage with incandescent or specifically shielded LED bulbs
- Move wireless routers away from the garage door opener
- Install ferrite cores on sensor wires to reduce electrical noise
- Shield sensor wiring by running it through metal conduit
Preventive Measures: Reducing Future Sensor Issues
Taking proactive steps minimizes how often you’ll need to fix garage door sensor problems in the future.
Protect Sensors from Physical Damage
Install protective measures:
- Mount small bollards or barriers to prevent vehicle impacts
- Add safety tape or markings to make sensor locations obvious
- Install sensor guards or cages in high-traffic areas
- Educate family members about sensor locations
Regular Testing Protocol
Don’t wait for problems to arise before you need to fix garage door sensor issues. Implement this monthly testing routine:
Monthly Testing Checklist:
FAQs: How to Fix Garage Door Sensor Problems
How long do garage door sensors typically last?
Quality sensors typically last 10-15 years with proper maintenance. However, environmental factors, frequency of use, and quality of installation affect lifespan. If your sensors are over 10 years old and requiring frequent attention, replacement may be more cost-effective than repeatedly trying to fix garage door sensor age-related failures.
Can I bypass garage door sensors temporarily?
While technically possible by holding the wall button continuously, bypassing sensors eliminates critical safety features and is not recommended. Children, pets, or objects in the door path could be injured. Instead, take time to properly fix garage door sensor issues to maintain safety.
Why does my garage door work with the remote but not the wall button, or vice versa?
This usually isn’t a sensor issue but rather a problem with the opener logic board or wiring to the wall button. Sensors affect both remote and wall button operation equally. If only one control method works, the problem lies elsewhere in your opener system.
Conclusion: Mastering How to Fix Garage Door Sensor Issues
Understanding how to fix garage door sensor problems empowers homeowners in Queens, NY, and nationwide to maintain safe, reliable garage door operation while saving money on service calls. Most sensor issues stem from simple causes—misalignment, dirt, loose connections—that are straightforward to resolve with basic tools and patience.
Key Takeaway: Regular maintenance, prompt attention to problems, and knowing when to call professionals ensures your garage door safety system protects your family while operating reliably for years. Whether you’re dealing with winter weather in Queens or desert dust nationwide, the principles to fix garage door sensor issues remain consistent: keep sensors clean, properly aligned, and protected from environmental factors.
By following the comprehensive guidance in this article, you’re now equipped to diagnose, repair, and prevent the most common sensor problems, keeping your garage door operating safely and efficiently.
Need Professional Help to Fix Garage Door Sensor Issues?
Queens, NY residents: Contact Garage Door Repair Queens for expert sensor diagnosis and repair. Our experienced technicians can quickly fix garage door sensor problems and ensure your door operates safely.
Nationwide: Use this guide’s diagnostic and repair techniques to fix garage door sensor issues yourself, or find qualified local professionals through manufacturer dealer networks if you need assistance.
Licensed • Insured • Guaranteed
 How to Align Garag..