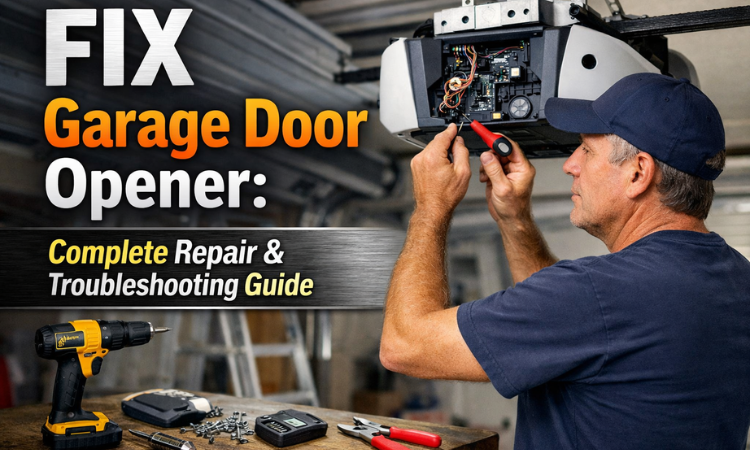
A garage door opener that suddenly stops working can cause more than just inconvenience. Whether you are late for work, unable to secure your garage, or dealing with a door that refuses to close, opener problems demand quick attention. Fortunately, many issues can be identified and fixed with the right approach.
This complete guide explains how to Fix Garage Door Opener, covering common problems, step-by-step troubleshooting, safety checks, repair costs, and situations where professional repair is the best option. If your garage door opener is not working properly, this guide will help you understand the issue and take the correct next step.
How a Garage Door Opener Works
Before attempting any repair, it helps to understand how a garage door opener operates.
A standard garage door opener system includes:
- A motor unit that powers the system
- A drive mechanism (chain, belt, or screw)
- Safety sensors near the floor
- A wall-mounted control button
- Remote controls
- A trolley and rail system
- Limit and force adjustment settings
When you press the remote or wall button, the motor moves the trolley along the rail, lifting or lowering the garage door. If any component fails, the opener may stop working, behave unpredictably, or reverse unexpectedly.
Common Signs Your Garage Door Opener Needs Repair
Garage door opener problems often show clear warning signs, including:
- Garage door opener won’t open or close
- Door opens partially and then stops
- Door closes and immediately reverses
- Remote control does not respond
- Wall button works but remote does not
- Motor runs but door does not move
- Clicking, grinding, or buzzing noises
- Flashing lights on the opener unit
Identifying these symptoms early can prevent further damage and costly repairs.
Step-by-Step Guide to Fix Garage Door Opener Problems
1. Check the Power Supply First
One of the most common reasons a garage door opener stops working is a power issue.
Start by checking:
- Whether the opener is plugged in
- If the circuit breaker has tripped
- Whether the outlet is working
- Any loose or damaged power cords
If the opener has no power, restoring electricity may solve the issue instantly.
2. Inspect the Garage Door Remote Control
If the opener does not respond to the remote:
- Replace the remote batteries
- Reprogram the remote to the opener
- Test the wall-mounted button
If the wall switch works but the remote does not, the problem is usually limited to the garage door remote control rather than the opener itself.
3. Clean and Align Safety Sensors
Safety sensors are designed to stop the door from closing if something blocks its path. Dirty or misaligned sensors are one of the most common causes of garage door opener failure.
Check for:
- Dust or debris on sensor lenses
- Sensors knocked out of alignment
- Loose or damaged wiring
Clean the lenses gently and make sure both sensors face each other. Most sensors display a steady light when properly aligned.
4. Reset the Garage Door Opener
A simple reset can often resolve electronic glitches.
To reset the opener:
- Unplug the unit from the power source
- Wait about 60 seconds
- Plug it back in
- Reprogram remotes if needed
This step can fix issues caused by power surges or temporary logic board errors.
5. Adjust the Limit Settings
If your garage door:
- Stops before fully opening
- Does not close all the way
- Reverses before reaching the ground
The limit settings may be incorrect.
Limit settings tell the opener how far the door should travel. Over time, these settings can shift due to temperature changes or mechanical wear. Adjusting them according to the manufacturer’s instructions often restores proper operation.
6. Inspect the Drive Mechanism
Garage door openers use different drive systems:
- Chain drive
- Belt drive
- Screw drive
Common issues include:
- Loose or sagging chains
- Worn or cracked belts
- Dry or noisy screw drives
Tighten loose chains, lubricate moving parts, and replace damaged components as needed. A poorly maintained drive system can cause jerky movement or complete failure.
7. Check the Emergency Release and Trolley
If the motor runs but the door does not move, the trolley may be disengaged.
This often happens if:
- The emergency release cord was pulled accidentally
- The opener lost connection during a power outage
To fix this, re-engage the trolley by running the opener until it reconnects to the carriage.
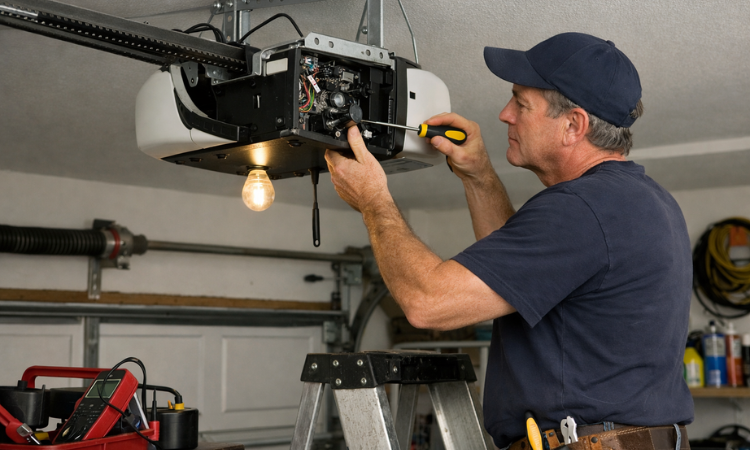
8. Inspect Wiring and the Logic Board
If your garage door opener behaves erratically, stops responding, or flashes error codes, the problem may be electrical.
Possible causes include:
- Loose wiring connections
- Damaged circuit boards
- Faulty logic boards
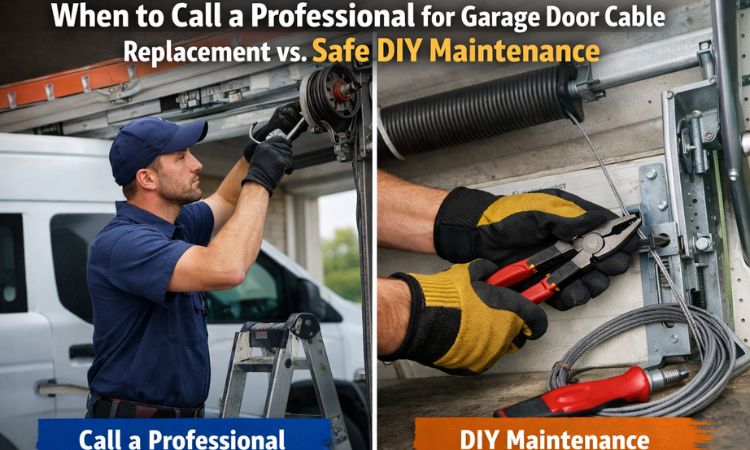
Electrical repairs require technical expertise. Attempting DIY fixes at this stage can cause further damage or safety hazards.
Garage Door Opener Safety Tips
While some troubleshooting steps are safe for homeowners, garage door systems involve heavy components and electrical parts.
Avoid DIY repairs if:
- The motor overheats or smells burnt
- The opener sparks or shows visible electrical damage
- The door is off-track
- The opener is very old or unreliable
In these cases, professional repair is strongly recommended.
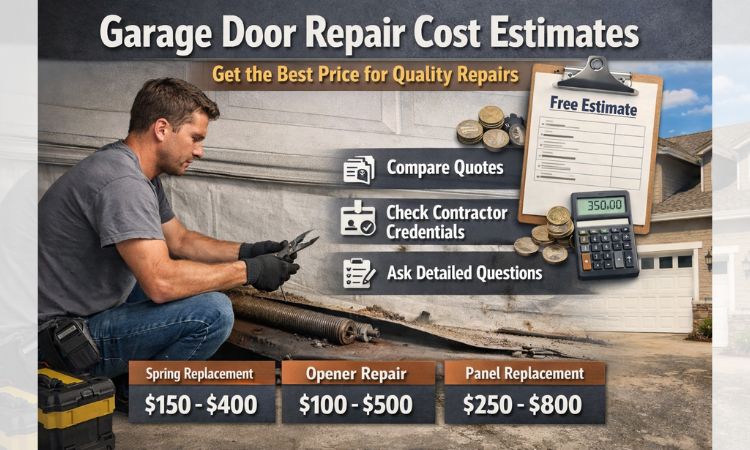
Cost to Fix Garage Door Opener
The cost to Fix Garage Door Opener depends on the problem and the opener’s condition.
Typical factors affecting cost:
- Sensor replacement or alignment
- Remote control issues
- Drive mechanism repair
- Circuit board replacement
- Motor failure
In many situations, repairing the opener is more cost-effective than replacing the entire unit, especially if it is under 10 years old.
Repair vs. Replace: Which Is Better?
Repair Is a Good Option If:
- The opener is relatively new
- The motor is still functioning
- The issue is related to sensors, remotes, or settings
- Repairs are infrequent
Replacement May Be Better If:
- The opener is over 12–15 years old
- Breakdowns occur frequently
- Safety features are outdated
- Repair costs approach replacement costs
A professional inspection can help determine the most cost-effective option.
Emergency Garage Door Opener Repair
Some garage door opener problems require immediate attention, including:
- The door is stuck open overnight
- The garage cannot be secured
- A vehicle is trapped inside
- The opener stops working during extreme weather
Emergency repair services help restore security and prevent further damage to your garage door system.
Preventing Future Garage Door Opener Problems
Regular maintenance can significantly extend the life of your opener.
Preventive tips:
- Clean and test sensors monthly
- Lubricate moving parts every six months
- Replace remote batteries annually
- Avoid forcing the door open or closed
- Schedule professional tune-ups
Proactive care reduces unexpected breakdowns and costly repairs.
Frequently Asked Questions
- Why does my garage door opener open but not close?
This is usually caused by sensor alignment issues or obstructions in the sensor path.
- Can I Fix Garage Door Opener motor myself?
Motor repairs are complex and should be handled by trained technicians.
- How long does a garage door opener last?
Most openers last between 10 and 15 years with proper maintenance.
- Why does my garage door reverse suddenly?
Incorrect limit settings, sensor problems, or obstructions are common causes.
Final Thoughts
Knowing how to Fix Garage Door Opener starts with understanding the system and recognizing common warning signs. While basic troubleshooting can solve many issues, some repairs require professional expertise to ensure safety and long-term reliability.
If your garage door opener continues to malfunction after troubleshooting, professional repair can restore proper operation, improve safety, and prevent further damage.